
Common Terms Defined:
- MAC Address
- (Media Access Control Address) is a unique identifier assigned to network interfaces for communications on the physical network segment.
- WAP
- (Wireless Access Point) is a device that allows wireless devices to connect to a wired network using Wi-Fi
- BSSID
- (Basic Service Set Identification) is the MAC address of the WAP
- ESSID
- (Extended Service Set Identification) is the display name of the wireless network
- WPA/WPA2
- (Wi-Fi Protected Access / Wi-Fi Protected Access II) are two security protocols and security certification programs developed by the Wi-Fi Alliance to secure wireless computer networks.
- PSK
- (Pre-Shared Key) is the term for the password defined in WPA/WPA2 encrypted networks.
Before we Begin:
The methods and tools used in this WPA / WPA2 hacking tutorial can be utilized without any previous knowledge, however it is best for the attacker to have an understanding of what is going on behind the scenes. My job with this tutorial is to break down each step of the attack process and explain it in a simplified manner. Assuming that the reader of this guide has no previous knowledge with hacking, Linux, or Network Security, I will take it slow (one step at a time). I know this stuff can be intimidating for beginners, but just follow the steps and you will start to understand the fundamentals of what is going on to be better protected against future malicious users.
It is important to note that hacking WEP is simple and is widely recognized as an inefficient encryption technique, thus why I have not covered it in this tutorial. Although WEP still exists in many places, most wireless networks these days have been configured with WPA/WPA2-PSK which are vulnerable to brute force attacks. I will explain that the success of hacking WPA/WPA2-PSK is only as good as the word list you are comparing against.
Step 1: Set up the VMware Software
Download and Install Required Software (FREE)
For the purpose of keeping this blog short, I am not going to provide instructions on how to download and install the VMware software. But the link and information to install VMware Player can be found below:
After VMware is installed, you are going to want to download the Backtrack 5 R3 (32bit) virtual machine from the following link. Backtrack 5 is a Linux distribution that is used for many different types of penetration testing/network security and much more. The download is archived using 7-zip so you will have to extract the contents before using.
With the software installed, make sure you are able to power up the virtual machine successfully. I have both Backtrack 5 R3 and the VMware View software running off my USB drive so I can operate it from any computer at any time. I have not seen any reduction really in performance because I am not really writing to the drive while its up and running.
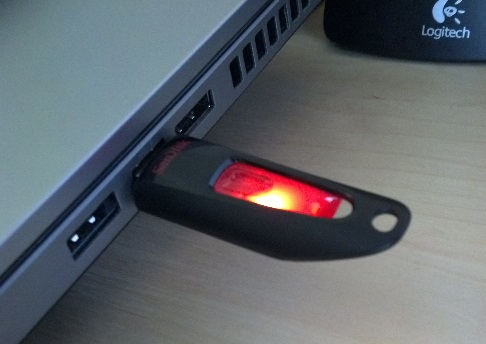
USB Device with Backtrack + VMware Player
Step 2: Preparation for the Attack!
If you are not familiar with command prompt or terminal then some of this may look a little foreign but I am going to break it down as best I can, and if you follow my instructions and type exactly as shown, there should not be any issue and you should be on your way to becoming a network penetration tester in no time!
Part I: View Network Interface Information
Since my internal wireless adapter does not support monitor mode, I have purchased an Alfa AWUS036H Long-Range 802.11N USB Network Adapter (~$38).
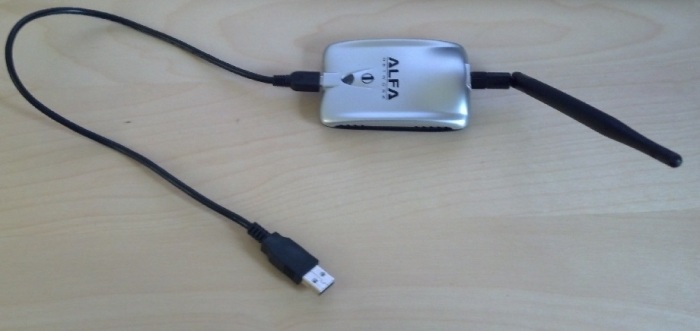
Alfa AWUS036H Wireless USB Adapter
This of course is only needed in the case that your internal wireless adapter is not compatible. However, most USB wireless adapters will work with this process. I simply plug it into my USB port and make sure it is recognized in the virtual machine.
To view a list of the recognized interfaces, open up the console and type in the following command and press enter.
ifconfig – command to view interfaces
ifconfig command
We need to shut down the interface before we spoof the MAC address because the interface cannot be in operation during this time.Type the below command and press enter
wlan0 – network interface
down – shut down interface
ifconfig down command
Now we can spoof the MAC address of the network adapter, in this case we are just going to set a static “phony” MAC address of 00:11:22:33:44:55. Type the below command and press enter.
1 | macchanger -m 00:11:22:33:44:55
|
macchanger – command to spoof MAC Address
-m 00:11:22:33:44:55 – specifying the MAC Address to spoof
Then after, we need to turn on the interface after the spoofed MAC address succeeded. Type the below command after MAC address spoof is finished and pressenter
up – turn interface on

macchanger command
Part II: Enable “Monitor Mode” on your Network Adapter
Monitor mode will allow your network adapter to view all network traffic within range, along with identifying information for each network found. This command will activate monitor mode on mon0. You will be presented with a message stating that “Monitor mode enabled on mon0″
airmon-ng – command for monitor mode
start wlan0 – starting monitor mode on wlan0 interface
monitor mode command
Part III: Verify “Monitor Mode” is enabled
Verify mon0 on the list of interfaces. To see the configuration of the monitor mode interface, type the following command and press enter. You should then see mon0 listed in the command results
iwconfig – command to view interface configuration
mon0 – interface used in monitor mode

Verify Monitor Mode
At this point, all the preparation is complete and we are now ready to move on to the fun stuff. The next stage will be choosing what network to perform the attack on.
Legal note: Hacking into networks is illegal, make sure you have been granted permission to test, or perform this on your own equipment. I cannot be liable for any misuse!
Step 3: Begin the Attack!
Now that the network interface is configured properly to monitor network traffic within range, we can proceed to selecting a target and performing the actual brute force attack.
Part I: Choose your victim!
Lets take a look at some of the network traffic within range of the wireless adapter. With the console still open, type in the following command and hit enter.
airodump-ng – command to view networks in range
List of Victims
As described above, you will be presented with an active list of all networks within range. The network that I have selected is my own. You see it labeled as “HackThisWiFi”. Here is the information that we will need for the next set of commands.
ESSID: HackThisWiFi
BSSID: 00:23:69:98:AC:05
Channel: 4
Encryption: WPA
Authentication: PSK
Part II: View all clients connected to Access Point
Now that we know which network to attack, we have to monitor that specific network and reveal any clients that may or may not be connected at that given time. In order for WPA / WPA2 hacking to work, it must capture the 4-way handshake that is accomplished when the client authenticates to the access point (AP).
Not only will we be viewing connected clients, but we will be capturing data specific to the HackThisWiFi access point and storing it to a capture file called “hackwpa”, type the following command and press enter.
1 | airodump-ng --bssid 00:23:69:98:AC:05 -c 4 -w hackwpa mon0
|
00:23:69:98:AC:05 – Access Point MAC Address
-c 4 – Channel 4
-w hackwpa – write to file “hackwpa”
mon0 - network interface
View Clients of Access Point
Part III: DoS the Access Point
Denial of Service (DoS) is a good way to accelerate the process of capturing the 4-way handshake because it sends a message to the client saying that that it is no longer associated with the Access Point. The reauthentication is what generates the 4-way authentication handshake we are interested in collecting. This is what we use to break the WPA/WPA2 pre-shared key.
The following command will deauthenticate clients to hopefully force them to reauthenticate.
1 | aireplay-ng -0 30 -a 00:23:69:98:AC:05 mon0
|
-0 30 – Send 30 DeAuth requests
-a 00:23:69:98:AC:05 – Access Point MAC Address
mon0 – Network Interface
Deauthenticate AP clients
Now that the clients have been deauthenticated from the AP, and the handshake has been captured sucessfully, we can start to process of cracking the PSK. (And you thought you were safe! ^-^)
Step 4: Time for PWNAGE!
Time to Crack the WPA / WPA2 Encryption using Aircrack
To accomplish this, you must have some type of wordlist to compare against the captured PSK. It essentially will check down the wordlist one by one until it reaches the correct key. This can be a very time consuming process and it takes quite a bit of processing power to execute. The faster your computer, the faster the key can be cracked. See the fun facts at the bottom of this post to get an understanding of password recovery speeds. There is also small dictionary that comes with aircrack-ng – “password.lst”. The file is found in the “test” directory of the aircrack-ng source code. Just send me an email and I can either send you my wordlist or show you how to create your own using crunch (default with Backtrack 5 R3).
Use the below command to start the cracking.
1 | aircrack-ng -w wordlist.lst -b 00:23:69:98:AC:05 hackwpa*.cap
|
aircrack-ng – command for the password cracker
-w wordlist.lst – specifying the wordlist to use (wordlist.lst)
-b 00:23:69:98:AC:05 – specifying the bssid of the AP
hackwpa*.cap – specifying the capture file

Aircrack command to crack PSK
Let the password cracker work with as much processing resources as possible, it could take a long time depending on the complexity of the WiFi password used. In my case, I placed the PSK near the top of the text file so I did not have to wait very long for the cracker to parse the wordlist one by one. This would not be possible if I was not aware of the PSK prior, and I would have to wait until every string in the wordlist is compared.
WPA / WPA2 Hack Complete
Protection Against Brute Force WPA / WPA2 Attacks
There are many ways to help protect and defend against brute-force attacks, here are a few tips to keep your WiFi a little safer from malicious intruders
- Setup MAC Address Filtering on Router
This makes it so that only specifically “whitelisted” devices are able to connect to your network. But as you know, a savvy hacker can also monitor the MAC address of a whitelisted client and then spoof their own MAC to gain access. Most of the time, this is not the case…
- Use a Complex Passphrase:
Using a combination of special characters, lowercase and uppercase letters, and also numberic characters can make the process of brute-forcing so time intensive that a hacker may just give up and move to an easier target. For my own network, I do not use a passphrase less than 15 characters in length. An example of a “safe” password would be “Th3Sm1ThF@mi1yWirEles$NeTw0rk2013″. By using a relatively easy sentence and changing some characters around to dramatically increase the complexity, it would take years for this password to be brute-forced.
- Change the Password Frequently:
Like shown above, it could take hours, weeks, even years to brute-force passwords. If you change it on a regular basis, then you are going to be one step ahead of your potential attacker.
- Turn off your router when you are not home:
If you are not using the WiFi when you are away, why have it on? It only allows an attacker more time to find vulnerabilities to gain access. If you only have your WiFi on when you are home, then you are drastically reducing the attack-time of the malicious hacker
Fun Facts:
Some interesting statistics regarding password recovery speeds. This speeds listed here are estimates of the maximum time it would take a common dual-core workstation to brute force various types of passwords. Keep in mind that a lot of people these days have quad-cores or clusters of computers that make the password recovery speeds drastically more efficient.
Numerals [0-9]
0123456789
10 Character Password: 2 ¾ Hours
Only Upper Case Alpha [A-Z] -or- Only Lower Case Alpha [a-z]
ABCDEFGHIJKLMNOPQRSTUVWXYZ -or- abcdefghijklmnopqrstuvwxyz
8 Character Password: 5 ¾ Hours
Only Upper Case Alpha [A-Z] -or- Only Lower Case Alpha [a-z]
+ Numerals [0-9]
0123456789ABCDEFGHIJKLMNOPQRSTUVWXYZ -or- 0123456789abcdefghijklmnopqrstuvwxyz
5 Character Password: Instant
Upper Case Alpha [A-Z] + Lower Case Alpha [a-z]
AaBbCcDdEeFfGgHhIiJjKkLlMmNnOoPpQqRrSsTtUuVvWwXxYyZz
8 Character Password: 62 Days
Upper Case Alpha [A-Z] + Lower Case Alpha [a-z] + Numerals [0-9]
0123456789AaBbCcDdEeFfGgHhIiJjKkLlMmNnOoPpQqRrSsTtUuVvWwXxYyZz
8 Character Password: 253 Days
Upper Case Alpha [A-Z] + Lower Case Alpha [a-z] + Special Char
AaBbCcDdEeFfGgHhIiJjKkLlMmNnOoPpQqRrSsTtUuVvWwXxYyZz!”#$%&’()*+,-./:;?@[\]^_`{|}~
8 Character Password: 23 Years


 An Indian hacker, named as Zero, has exposed over a dozen high profile Pakistani websites – which are vulnerable and hack-able.


